What Cleans Foggy Headlights?
In a minute you’re going to find out which product the data says is are the best headlight cleaning kits.
But first:
Let’s discuss 3 auto problems we’re all too familiar with that are caused by Phoenix sunlight…
First, the need to replace windshield wiper blades yearly due to dry rot, but the UV rays don’t stop there. Second, they cook car paint and interiors. And third, they oxidize headlights and turn them foggy, which is our topic for this DIY auto tip.
In Phoenix, you can look at any car or truck a couple of years old, and you’ll see cloudy or foggy headlight lenses. Your lenses are probably foggy, too! Why is this?
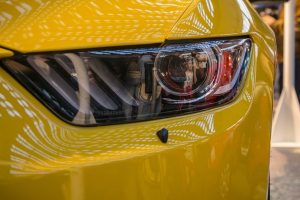
Most twenty-something-year-old drivers wouldn’t remember when headlights were round or rectangular bulbs. The perfect example is an old Mustang with round headlights…
Nowadays headlights are molded plastic assemblies with a small halogen bulb that clips in. Enough history for today, back to our main topic…
 Which Are The Best Headlight Cleaning Kits?
Well:
Before we go any further let’s break this car problem down.
The solution we’re looking for needs to do 3 things:
- It needs to remove oxidation. Oxidation is a cloudy film that builds on the lens surface. The same thing happens with car paint, too. But car wax is another topic we’ll cover another time. It needs to clean lenses.
- Once the oxidation is cleaned off, the product needs to repair the headlight lens surface, so the plastic is clear again. Just sanding off the film isn’t enough. We want a ‘like new’ lens when we’re done. It needs to shine!
- It needs to protect the headlight lens surface from future oxidation and discoloration. Protect.
And I’ll throw in the 4th requirement…
The cleaner needs to be easy to use so anyone can follow the steps safely and clean their headlights.
Now let’s see which product is the best car headlight cleaner…
Headlight restoration kits.
After reading far too many Amazon reviews about which headlight cleaner works the best I have found 3 cleaner kits with above-average reviews.
But I have a dilemma.
I only need 2 kits to compare because I only have 2 cars.
Hmm…
Here’s what I’m going to do.
I’m going to use my Amazon Prime and buy the top 2 reviewed kits. I’ll test one on my car and one on my wife’s car.
Yes, both cars have foggy headlights…
Unfortunately for the 3rd headlight restoration kit, I’m not going to be able to compare it against the other packages.
What I’ll do is post the data for the 3rd kit so you can compare it, too…
Comparing Best Headlight Lens Restorer Kits (Data current as of 6/2018)
Ready, let’s do this!
#1. Let’s start with a brand we all know and trust around the house, 3M.
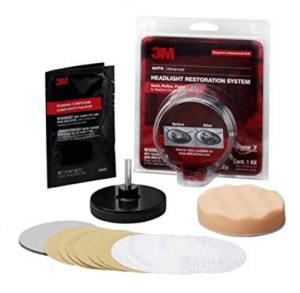
3M 39008 Headlight Lens Restoration System
The 3M kit ranks the highest, and at this writing, is in the top position on Amazon.
- Listed as a Best Seller
- Average 4.5 Stars
- Sold and Shipped by Amazon
- Eligible for Prime Shipping
3M 39008 Headlight Lens Restoration System Product Details
- KIT INCLUDES: 1 - Disc Pad Holder, 3.25 in (8,2 cm) 6 - 3M Gold Sanding Discs 500 Grit, 3 in (7,6 cm) each 4 - 3M White Finishing Discs 800 Grit, 3 in (7,6 cm) each 1 - 3M Trizact Refining Disc, 3 in (7,6 cm) 1 - 3M Rubbing Compound, 1 US fl oz (29 m
- LIKE NEW HEADLIGHTS: Easy heavy duty kit solution help your headlights look like new
- REMOVE HARSHEST YELLOWING: Kit is powered by drill-activated sanding to provide maximum clarity
- RESTORE CLEARNESS: Improve the appearance of your vehicle
- SEE BETTER AT NIGHT: Enhances visibility and safety for night driving
#2. Next on the list is another brand we know, but this brand is more associated with electronics. Let’s welcome…
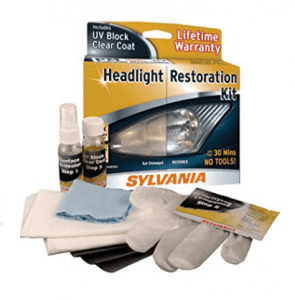
SYLVANIA Headlight Restoration Kit
The SYLVANIA kit comes in 2nd place…
- Listed as a Best Seller, too!
- Averaging 4.5 Stars
- Sold and Shipped by Amazon
- Eligible for Prime Shipping
This kit is not as popular as the 3M, but I guess it’s due to the difference in price.
SYLVANIA Headlight Restoration Kit Product Details
- Restores Headlight To A Like-New Appearance and Removes Haze: Headlight lenses on your vehicle can become yellow, dull, and hazy from the sun. Our Headlight Restoration Kit fully removes haze and corrosion and restores the clarity and shine you need to see downroad at night.
- Restores Headlight Light Output: Restores original clarity and vision to sun damaged plastic headlight lenses. The lenses will be clearer, the headlight will shine brighter, and the road ahead will be better illuminated.
- 3 Easy Steps To Restore Long Lasting Uv Protection To Your Headlights: Step 1 - Surface Activator, Proprietary activator softens plastic, making it easier to sand smooth. Step 2 - Sand and Polish. Step 3 - Finish and seal with UV Block Clear Coat applicator.
- Lifetime Warranty: The components of this kit are good for two headlight assemblies. Once installed properly, the performance of the Sylvania Headlight Restoration Kit is guaranteed by a Lifetime Warranty for as long as you own your car.
- The Sylvania Standard Of Quality: With over 100 years in business, Sylvania is the world leader in automotive lighting for Original Equipment Manufacturers (OEMs) and the aftermarket.
 #3 Coming in a close third on the list of best headlight cleaning kits is another brand we all know. Let’s hear it for Turtle Wax!
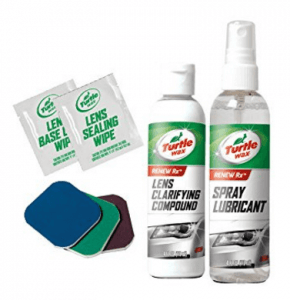
Turtle Wax T-240KT Headlight Lens Restorer Kit
What would cars look like without Turtle Wax? About 20 years ago I had a red Cutlass Supreme that I used to wax all the time with Turtle Wax. When I was done, my hands and every towel in the house were red. But it got the oxidation off, and my car was shiny!
Alright already…
The headlight cleaning kit by Turtle Wax came in close for 2nd place…
- Averaging 4 Stars
- Sold and shipped by Amazon
- Eligible for Prime Shipping
Don’t get mad at me. I’m only telling you what the data says.
Turtle Wax T-240KT Headlight Lens Restorer Kit Product Details
- Kit includes: 3 restoration pads of various grits from 2400 to 8000 grit, Spray Lubricant (4 oz.), Lens Clarifying Compound (4 oz.) and Lens Sealing Wipe (4"x4")
- Can be used on all lenses, plexiglass and plastic surfaces
- Restores dull, yellowed headlights to like new condition in less than 5 minutes per lens
- Lens Clarifying Compound quickly removes surface discoloration and may be all that is needed to restore clarity
- 3 multi-stage wet restoration pads focus on deeper discoloration and scratches to restore the lens to like new condition
Watch this video on how to clean headlights…
Which Headlight Cleaning Kit Will be the Best?
As I said in the beginning, I’ll go with the data because I need some heavy-duty headlight restoration…
So it looks like I’ll be comparing the 3M vs. the SYLVANIA headlight cleaner kits to see which is the best foggy headlight fix.
It’ll be a week or so before I post the update from my test results so stay tuned.
You don’t need to wait for me.
Go ahead and order one of the headlight lens cleaning kits online via one of the links I provided (save the trip and frustration of standing in line).
Or drive on over to Walmart, Autozone, or Pepboys and see what kits are available near you.
My guess is they’ll all have similar foggy headlight cleaners and as long as the solution does what we agreed:
Cleans, polishes and protects, we’re all good.
I wish there were something the car manufactures would do to improve the headlight lens so we wouldn’t have to hassle with cleaning oxidation off plastic headlight lenses. Although, I’m sure Lexus and Mercedes Benz don’t have this problem? Hmm…
I’ll have to inspect the next luxury car I see in the parking lot at work to see if pricier cars have glass or plastic headlight lenses. Hopefully, the security guard doesn’t think I’m breaking into the car and arrest me!
I can hear myself telling the guard, Nah, I’m good. I’m just checking to see if the lens is plastic or glass…
DIY Tip:
That does it for this DIY Gotcha Garage Tip. Please feel free to share your comments and feedback below, and share this tip with someone on social networks…
Don’t go another day with foggy headlight lenses now that you know how to clean them!
*Options last updated on 2024-02-23 at 15:29.


