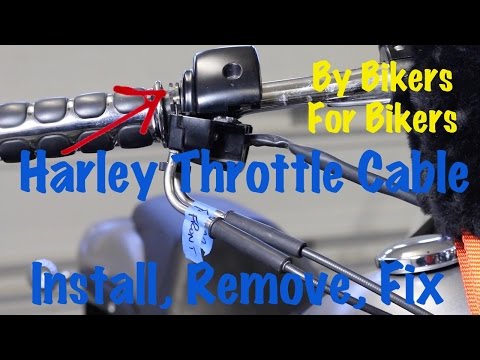
Throttle Cable Replacement: A Step-by-Step Guide
Are you having trouble with your Harley Davidson’s throttle cable and need to replace or repair it? Look no further, as we have a detailed guide on how to do it yourself. This article will take you through the step-by-step process of fixing your Harley Davidson throttle cable.
How to Replace a Harley Davidson Throttle Cable

Step 1: Prepare Your Harley Davidson
Preparing your Harley Davidson is the first step in replacing your throttle cable. You must put a cardboard shim in the brake lever to ensure the pressure is off the brake light switch. This will prevent the switch from being sheared off during the process.
Step 2: Remove the Housing
Using a T25 wrench, remove the top bolt from the housing. Then, work on the bottom bolt to release the housing. Next, use a Torx 27 to remove the two pinch bolts that secure the clamp. Finally, remove the top pinch bolt while holding the brake reservoir to prevent it from falling into the tank.
Step 3: Remove the Cable Guides
Peel back the boots and locate the adjuster nut and lock nut. Loosen these nuts to make it easier to remove the cable ferrules. Lift the cable and rotate the ferrule to remove it. Do this for both the front and back throttle cables.
Step 4: Remove the Throttle Cable
Pop out the throttle cable by wiggling it around and turning it back and forth. Do the same for the return cable. The cables have a c-clip that retains them within the housing.
Step 5: Remove the Back Plate
Remove the air cleaner cover by using a 5/16-inch hex head. Then remove the filter and the bolts behind the crank breathers. Remove the back plate to expose the cables.
Step 6: Remove the Cable Ferrules
Loosen the cable ferrules using a pair of needle-nose pliers. Turn the cable ferrule about a quarter turn so you can get the guide and then back it out. Do this for both the front and back throttle cables.
Step 7: Replace the Cable
To replace the cable, push it into the top of the plate and run it down the channel. Lift the cable out and pull it out of the channel. Use a free video on law-abidingbiker.com to learn how to remove the tank and replace the cables.
Step 8: Adjust the Cable
Use the adjuster nut to take some slack out of the cables. Adjust the throttle snapback to your preference. Put the jam nuts into the adjuster nut to keep it in place.
Step 9: Test the Cable
Start the bike and work the throttle to ensure it is adjusted to your preference. Tighten everything down, and you’re good to go!
In conclusion:
Replacing your Harley Davidson throttle cable is not as difficult as it may seem. Follow these steps carefully, and you’ll have your cable replaced quickly. Don’t forget to check out law-abidingbiker.com for more helpful tips and tricks for your Harley Davidson.
Start from the beginning and see more DIY videos about DIY Harley Davidson repairs…
Helpful products for you based on this Harley Davidson repair video.
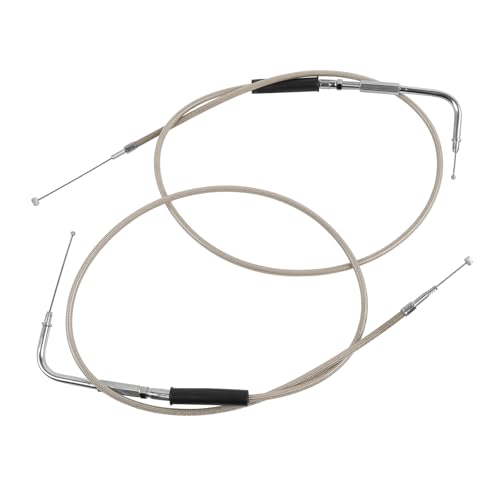
- Fitment: The throttle cable compatible with Harley Road King Dyna Softail FLH FLT 1996-2007 FXD FLST FXST 1996-2010
- Replace Part Number: Replace for part number of throttle cable: 56884-07, 5634301, 5634396, 5635696A, 5642106, 5643298. Replace for part number of idle cable: 56885-07, 5634201, 5634296, 5635596A, 5641506, 5643398.
- Premium Material: The throttle gas cable feature chrome-plated polished fittings and stainless steel braiding. All cables are made with anti-friction inner liners, the inner PE liner braided with stainless steel reinforcement embedded in a tough PVC outer protector, ensures the whole cable a longer life and a better performance when using.
- Great Function: Throttle idle cable housing lengths are 39" , 90° elbow fitting with spring, they are used for adding taller Handlebars and Risers to your motorcycle. Regular replacement of new cables can keep your bike working smoothly, ensuring cycling safety.
- Easy to Use: The throttle cable wire kit is easy to install and does not include instructions. Some motorcycles may require longer than normal cable lengths to ensure installation and prevent errors, please check the length you require before purchasing.
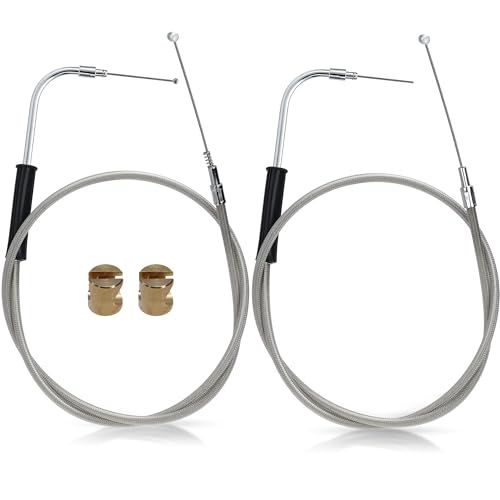
- Fitment - This Throttle Cable fits for 2007–2010 Softail FXST Custom Night Train Deuce FXSTB FXSTC FXSTD 16" Handlebar 2000-2006 Touring Road Street Electra Glide King Ultra Classic without Cruise Control 14" handlebar
- Quality Speaks - This Harley throttle cable extensions are stainless steel braided with a durable outer PVC casing and smooth-operating inner cables. This design helps avoid any scratches and breaks; the Electra Glide cables are soft and flexible. The Street Glide kit is complete with chrome-plated ends, which makes them durable enough for using
- Functions - The Night Train idle(with spring) and throttle cables both feature housing lengths of 43.29", both equipped with a 135° or 90° elbow fitting. These Softail throttle cables are designed for adding taller handlebars and risers to your Harley. Regular replacement with new cables ensures your bike runs smoothly and helps eliminate throttle hesitation for a more enjoyable, confident ride
- Easy to Install - Featuring a protective inner sleeve and a bolt-on design, these Touring extended throttle cables provide a smoother pull and a hassle-free installation
- Precise Compatibility - Each cable’s length and diameter are carefully calibrated to meet your cable-route specifications, ensuring maximum compatibility and reliable performance
- Fitment: The throttle cable compatible with Harley Road King Dyna Softail FLH FLT 1996-2007 FXD FLST FXST 1996-2010.
- Replace Part Number: Replace for part number of throttle cable: 56884-07, 5634301, 5634396, 5635696A, 5642106, 5643298. Replace for part number of idle cable: 56885-07, 5634201, 5634296, 5635596A, 5641506, 5643398.
- Premium Material: The throttle gas cable feature chrome-plated polished fittings and stainless steel braiding. All cables are made with anti-friction inner liners, the inner PE liner braided with stainless steel reinforcement embedded in a tough PVC outer protector, ensures the whole cable a longer life and a better performance when using.
- Great Function: Throttle idle cable housing lengths are 43" , 90° elbow fitting with spring, they are used for adding taller Handlebars and Risers to your motorcycle. Regular replacement of new cables can keep your bike working smoothly, ensuring cycling safety.
- Easy to Use: The throttle cable wire kit is easy to install and does not include instructions. Some motorcycles may require longer than normal cable lengths to ensure installation and prevent errors, please check the length you require before purchasing.
*Options last updated on 2026-02-19 at 18:04.

